Selasa, 18 September 2012

“PANDUAN SETUP MAIL CLIENT DI MAC BOOK “


“PANDUAN SETUP MAIL CLIENT DI MAC BOOK “

1. Klik Icon email di bagian bawah (dalam lingkaran merah)
Description: http://blog.idwebhost.com/wp-content/uploads/2011/09/icon-email.png
2. Isilah Nama anda, Email Anda, dan Password email anda, Lalu Klik Continue
Description: http://blog.idwebhost.com/wp-content/uploads/2011/09/Screen-shot-2011-09-08-at-9.03.15-AM.png
3.  Pilih POP 3, Description = kosongkan,
Incoming mail server = isi sesuai nama domain anda, misal jogjacamp.com atau mail.jogjacamp.com
Lalu username : Tulis email anda, dan password email anda, Klik Continue
Description: http://blog.idwebhost.com/wp-content/uploads/2011/09/Screen-shot-2011-09-08-at-9.07.12-AM.png
4.  Bila Muncul pesan : Mail cant verify the indentity of “domainanda.com” klik CONNECT
Description: http://blog.idwebhost.com/wp-content/uploads/2011/09/Screen-shot-2011-09-08-at-9.12.12-AM.png
5.  Description = kosongkan, Isilah Outgoing mail server dengan nama domain anda, atau Smtp sesuai koneksi internet yang anda pakai
misal : jogjacamp.com atau mail.jogjacamp.com, atau smtp sesuai koneksi internet anda, misal smpt.telkom.net (untuk speedy)
Description: http://blog.idwebhost.com/wp-content/uploads/2011/09/Screen-shot-2011-09-08-at-9.16.18-AM.png
6. Klik Continue, lalun klik Connect, bila ada pertanyaan tentang Outgoing Mail Security  langsung klik Continue
Description: http://blog.idwebhost.com/wp-content/uploads/2011/09/Screen-shot-2011-09-08-at-9.19.47-AM.png
6.  Bila muncul Account Sumary Klik CREATE
Description: http://blog.idwebhost.com/wp-content/uploads/2011/09/Screen-shot-2011-09-08-at-9.20.42-AM.png
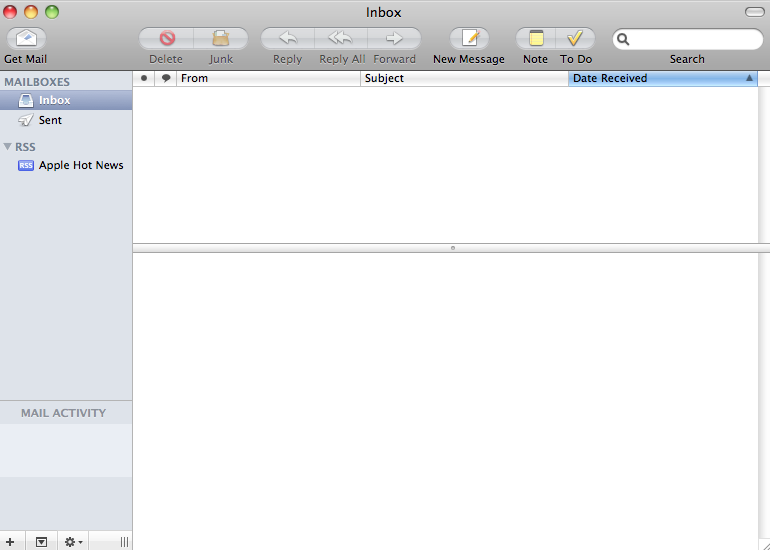
8. Selesai Email siap digunakan, maka muncul menu-menu email seperti dibawah ini, untuk melihat email klik Inbox dan Mengirim email klik New Message
Description: http://blog.idwebhost.com/wp-content/uploads/2011/09/Screen-shot-2011-09-08-at-9.22.56-AM.png

Jumat, 08 Juli 2011

"INSTALL PAKET WEB PADA SERVER LINUX UBUNTU"

langkah-langkah install web Apache, PHP dan server database MySQL langkah-langkahnya sebagai berikut:


Instalasi web server Apache
# apt-get install apache2

Instalasi database server MySQL
# apt-get install mysql-server

Instalasi php untuk web server Apache
# apt-get install php5

Instalasi MySQL untuk Apache
# apt-get install libapache2-mod-auth-mysql
# apt-get install php5-mysql

Jumat, 24 Juni 2011

Menghapus/Uninstall/Remove Webmin dari Beberapa Macam OS


Iseng-iseng saja menulis turorial ini. Kenapa saya harus menghapus webmin? ceritanya pada beberapa saat yang lalu saya dikagetkan dengan penggunaan RAM server yang melonjak tajam. Setelah menganalisa proses yang berjalan di server, baru diketahui kalau salah satu service webmin leak dan menghabiskan memory lebih besar dari kondisi normal.
Akhirnya saya harus menghapus webmin, kemudian menginstall kembali. Cara yang digunakan untuk menghapus webmin adalah sebagai berikut:
1. Remove Webmin RPM (RHEL / Centos / Fedora )
# rpm -ev webmin

2. Uninstall Webmin Source Installation
# /etc/webmin/uninstall.sh

3. Solaris UNIX Remove Webmin Software
# pkgrm WSwebmin

4. Debian / Ubuntu Linux Remove Webmin Software
# apt-get --purge remove webmin

5. FreeBSD Remove Webmin Software
# cd /usr/ports/sysutils/webmin
# make deinstall clean
ref: http://www.cyberciti.biz

Sabtu, 18 Juni 2011

Queue Tree with more than two interfaces Basic Setup


This page will talk about how to make QUEUE TREE in RouterOS that with Masquerading for more than two interfaces. It’s for sharing internet connection among users on each interfaces. In manual this possibility isn’t written.

First, let’s set the basic setting first. I’m using a machine with 3 or more network interfaces:
[admin@instaler] > in pr
#    NAME       TYPE    RX-RATE    TX-RATE    MTU
0  R public     ether   0          0          1500
1  R wifi1      wlan    0          0          1500
2  R wifi2      wlan    0          0          1500
3  R wifi3      wlan    0          0          1500
And this is the IP Addresses for each interface:
[admin@instaler] > ip ad pr
Flags: X - disabled, I - invalid, D - dynamic
#  ADDRESS           NETWORK      BROADCAST      INTERFACE
0  10.20.1.0/24      10.20.1.0    10.20.1.255    public
1  10.10.2.0/24      10.10.2.0    10.10.2.255    wifi1
2  10.10.3.0/24      10.10.3.0    10.10.3.255    wifi2
3  10.10.4.0/24      10.10.4.0    10.10.4.255    wifi3
On the public you can add NAT or proxy if you want.

Mangle Setup

And now is the most important part in this case.
We need to mark our users. One connection for upload and second for download. In this example I add mangle for one user. At the end I add mangle for local transmission because I don’t QoS local trafic emong users. But for user I need to separate upload and download.
[admin@instaler] ip firewall mangle> print
Flags: X - disabled, I - invalid, D - dynamic
    disabled=no
0 chain=forward src-address=10.10.2.36 action=mark-connection \
   new-connection-mark=users-userU passthrough=yes comment="" disabled=no
1 chain=forward dst-address=10.10.2.36 action=mark-connection \
   new-connection-mark=users-userD passthrough=yes comment="" disabled=no
2 chain=forward connection-mark=users-userU action=mark-packet \
   new-packet-mark=userU passthrough=yes comment="" disabled=no
3 chain=forward connection-mark=users-userD action=mark-packet \
   new-packet-mark=userD passthrough=yes comment="" disabled=no
98  chain=forward src-address=10.10.0.0/16 dst-address=10.10.0.0/16
    action=mark-connection new-connection-mark=users-lokal passthrough=yes
99  chain=forward connection-mark=users-lokal action=mark-packet
    new-packet-mark=lokalTrafic passthrough=yes

Queue Tree Setup

And now, the queue tree setting. We need one rule for downlink and one rule for uplink. Be careful when choosing the parent. for downlink traffic, we use parent “global-out”, because we have two or more downloading interfaces. And for uplink, we are using parent “public”, we want QoS uplink traffic. (I’m using pcq-up and download from manual) This example is for 2Mb/1Mb
[admin@instaler] > queue tree pr
Flags: X - disabled, I - invalid
0   name="Download" parent=global-out packet-mark="" limit-at=0
    queue=pcq-download priority=1 max-limit=2000000 burst-limit=0
    burst-threshold=0 burst-time=0s
1   name="Upload" parent=WGW packet-mark="" limit-at=0 queue=pcq-upload
    priority=1 max-limit=1000000 burst-limit=0 burst-threshold=0
    burst-time=0s
Now we add our user:
2   name="user10D" parent=Download packet-mark=userD limit-at=0
    queue=pcq-download priority=5 max-limit=0 burst-limit=0
    burst-threshold=0 burst-time=0s
3   name="user10U" parent=Upload packet-mark=userU limit-at=0
    queue=pcq-upload priority=5 max-limit=0 burst-limit=0 burst-threshold=0
    burst-time=0s
souce = wiki.mikrotik.com

User Manager Untuk Hotspot Mikrotik


User Manager Mikrotik merupakan management system yang apat dipergunakan untuk memanage user sbb:
  1. HotSpot users
  2. PPP (PPtP/PPPoE) users
  3. DHCP users
  4. Wireless users
  5. RouterOS users.
  • Pada tulisan ini akan sedikit diulas mengenai User Manager untuk hotspot user. Sebelumnya paket hotspot dan dhcp server harus sudah terintall/enable dan dikonfigurasi terlebih dahulu pada Mikrotik RouterOS. Asumsi pada tulisan ini RouterOS terdiri atas 1 Wlan dan 1 ether. Ether sebagai interface yang terhubung ke internet sedangkan wlan sebagai interface yang terhubung ke hotspot client.Ip ether 1 192.168.0.40 dan wlan 1 dengan ip 172.16.0.1/24. Langkah-langkahnya sebagai berikut:
  • 1. Set DHCP Server pada interface wlan1 ( Set Dhcp server ada pada tulisan terdahulu).
  • 2. Set Hostpot
  • / ip hotspot profile set hsprof1 use-radius=yes
  • 3. Set Radius Client untuk User Manager menangani hotspot
  • / radius add service=hotspot address=172.16.0.1 secret=123456
  • Sebagai catatan pertama kali hotspot user autentifikasi akan membaca pada database /ip hotspot user print. Remove data pada direktori ini agar autentifikasi pada radius.
4. Install User Manager
- Buka system packages dari winbox atau terminal
  /system/packages/print
- Jika belum ada paket user manager install dulu. Karena User-manager merupakan paket terpisah   dari router os MT. Pastikan versi outer OS sama dengan versi paket user manager. Misalnya jika router os kita 2.9.50 maka paket user-manager juga harus 2.9.50.
Download dari http://www.mikrotik.com/download.html, pilih salah paket user-manager-2.9.x.npk dari paket zip
 - Upload via Program FTP Ke Mikrotik Server
 -  Reboot Mikrotik Server
 -  Cek system packages spt no 1, jika user manager belum aktif diaktifkan terlebih dahulu kemudian reboot. Jika sudah aktif
 - buka http://192.168.0.40/userman
 - Jika sudah bisa terbuka halaman login user manager, berarti user manager sudah aktif.
  • 5. Buat Pada User Manager nama subcriber
  • / tool user-manager customer add login="admin" password=123 permissions=owner
  • 6. Buat Hotspot Router
  • / tool user-manager router add subscriber=admin ip-address=172.16.0.1 shared-secret=123456
  • 7. Buat User untuk Hotspot
  • / tool user-manager user add username=fajar password=123 subscriber=admin
Silahkan dicoba untuk konek hotspot dengan laptop dan User manager dapat diakses melalui http://192.168.0.40/userman. Menu-menu yang  terdapat di dalamnya antara lain status login, add user, delete user, log dan lain-lain. Lengkapnya seperti ini http://wiki.mikrotik.com/wiki/User_Manager/Customer_page

Referensi:
http://wiki.mikrotik.com/wiki/MikroTik_User_Manager
http://wiki.mikrotik.com/wiki/User_Manager/Hotspot_Exampl

Limit Different Bandwidth In Day and Night in Mikrotik


There are lot many ways to limit bandwidth for day and Night, but personally I found this is the easiest way, Here it is.
I have used Simple Queue, Script and Scheduler.
Suppose we have one network 192.168.1.0/24 and want to limit Bandwidth for day and Night Time.
Network 192.168.1.0/24
Bandwidth = 06:00am – 18:00pm – 1Mbps. 
Bandwidth = 18:00pm – 06:00am – 2Mbps. 
Create two simple queues for the same network with different Bandwidth Limit.
/queue simple
#name=”Day” target-addresses=192.168.1.0/24 dst-address=0.0.0.0/0
interface= parent=none direction=both priority=8
queue=default-small/default-small limit-at=512k/512k
max-limit=1M/1M total-queue=default-small

#name=”Night” target-addresses=192.168.1.0/24 dst-address=0.0.0.0/0
interface= parent=none direction=both priority=8
queue=default-small/default-small limit-at=1M/1M
max-limit=2M/2M total-queue=default-small
Now, write scripts
/system script
#name=”Day” source=/queue simple enable Day; /queue simple disable Night

#name=”Night” source=/queue simple enable Night; /queue simple disable Day
Finally, Schedule it
/system scheduler
#name=”Day” on-event=Day start-date=oct/13/2007 start-time=06:00:00 interval=1d

#name=”Night” on-event=Night start-date=oct/13/2007 start-time=18:00:00 interval=1d

Mikrotik : Membuat Server Radius


Mikrotik Part I :
1. Masukan CD Mikrotik
2. Pilih Sofware yang mau diinstal ke dalam PC kita klw mau pilih semua (Alt+A)
3. Langkah Penginstalan : Untuk Menginstal Tekan (Alt+i)
4. Tunggu Loading……
5. Boot/Restart(Keluarkan CD)
6. Muncul Pertanyaan Jawab [N]
7. Login : admin Password : ……….
8. Buat IP Address Ketik :
a. ip address add address=202.152.2.107/24 interface=ether1(ip yang berasal dari pemberi koneksi)
b. ip address add address=192.168.0.1/24 interface=ether2 (ip yang untuk ether2,yang akan dibagi ke klain)
c. ip route add gateway=202.152.2.254 (buat ip gateway)
d. ip dns set primary=202.51.229.8 (buat ip dns)
9. Buat DHCP Server Ketik :
a. ip dhcp server setup
b. ether2
10. tinggal Enter2 Saja..
Mikrotik Part II
I. Buat IP Firewall(agar klain bisa internetan) Ketik :
1. ip firewall nat add chain=srcnat action=masquerade out-interface=ether1
* untuk kembali dari editan/remove Ketik : [/]
II. Buat Billing ( ” Setting Radius Server ” )
* seperti di warnet2..selalu menggunakan billing..(fungsinya mengatur waktu pemakaian si klain dan untuk masuk ke sistem koneksi) car buatnya Ketik :
1.* radius add service=hotspot address="ip ether2″ secret=123456
2. buat hotspot yang mengarah interface client Ketik :
* ip hotspot add name= hotspot interface=ether2
3. Set profile Ketik :
* ip hotspot profile set default login-by=https,http-pap,http-chap use-radus=yes
4. Buat costumer untuk Administrator Username Ketik :
* tool user-manager customer add login=admin password=admin permission=owner
5. Buat router Pada User Manager Ketik :
* tool user-manager router add ip-address="ip ether2″ shared-secret=123456 subserible=admin
6. Buat User Pertama Untuk Custumer Ketik :
* tool user-manager user add username=user1 password=user1 first name=user1 subscriber admin
7. Aktifkan Hotspot yang Baru Di Setting Ketik :
* ip hotspot enable hotspot sudah selesai……..
keterangan :
* Swic===>Ether1
Klain===>Ether2
* Untuk melihat Gateway=>ip route pr
* untuk melihat ip=>ip address pr
* untuk Remove Gateway=>ip route remove
* Ping Gateway=202.152.2.254
* Untuk Melihat Perangkat Ethernet=>interface pr
* Untuk Melihat IP Address=>ip address pr
* CAra Mereset Mikrotik =>system reset=>pilih Yes